Camper Roof Repair Cost: What to Expect in 2026
Camper roof repair costs $150 to $6,000 for towable rigs and truck campers. EPDM rubber dominates, DIY saves real money, and on cheap rigs the repair-vs-value math matters most.
Typical cost
$150–$6,000
Most camper owners pay $300–$1,800 for a professional repair; a full DIY reseal kit runs $150–$550
Most people pay around
$900
Costs verified June 2026
Camper roof repair costs $150 to $6,000 for towable travel trailers and truck campers, with most professional patch jobs landing between $300 and $1,800. What makes camper roofs different from motorhome repairs isn’t the material or the labor rate; it’s the math. On a $9,000 travel trailer, a $3,000 roof job is a real decision point. On a $4,000 camper that’s already soft in the floor, it can be a dealbreaker. Knowing the cost tiers and where your rig sits in them is half the work.
Why EPDM rubber dominates camper roofs
The majority of travel trailers and fifth wheels built since the mid-1990s use EPDM rubber membrane roofs. The material is lightweight, flexible enough to handle the flex and road vibration a towed rig sees, and inexpensive to manufacture. Truck campers add EPDM over their soft-shell or aluminum-framed sections for the same reasons.
TPO has gained share on rigs built in the last decade and offers slightly better UV resistance. Fiberglass appears on higher-end travel trailers. But if you bought a used camper in the $8,000-$20,000 range, rubber is almost certainly what’s on top.
That matters because EPDM is the most DIY-friendly of the common roof materials. It patches with tape and liquid coatings, reseals with standard lap sealant, and tolerates beginner mistakes better than TPO or fiberglass. For budget camper owners, the DIY case is strong.
Cost by repair type
Severity determines your cost tier more than anything else.
DIY reseal and sealant touch-up ($150-$550): Every penetration collar, every seam cap, every lap joint where the membrane overlaps a trim strip is a potential entry point for water. Annual reseal with Dicor self-leveling sealant costs $40-$80 in materials. A more comprehensive DIY treatment including liquid rubber coating, primer, seam tape, and sealant runs around $550 total.
Small professional leak patch ($300-$800): A single entry point, traced and sealed, with the immediate area inspected for early moisture. This is the best-case professional repair scenario, and it’s only achievable if you caught the failure within the same season it opened.
Section repair with decking work ($1,500-$3,500): Water was in the structure long enough to wet the plywood decking beneath the membrane. A section of membrane comes off, soft or delaminating decking gets cut out and replaced, new membrane gets patched in or a section of new material is bonded over the repair. This is the most common “I budgeted for a patch and left with a much bigger bill” scenario.
Major structural repair ($3,500-$6,000): Multiple failed areas, widespread rot, or water that reached roof framing and ceiling structure. At this tier on a budget camper, run the numbers before authorizing work.
Full rubber roof replacement ($2,500-$5,500 for smaller campers): Full membrane removal, decking inspection and replacement as needed, new EPDM or TPO membrane installed. Material cost is $2.50-$5.50 per square foot depending on membrane type; labor adds $2-$6 per square foot. A 20-foot travel trailer with roughly 280 sq ft of roof can come in around $2,500-$4,500 professionally installed.
The repair-versus-rig-value question
This is the calculation that sets camper roof repair apart from motorhome roof repair. Nobody agonizes over a $1,800 patch on a $90,000 Class A. Plenty of people should think hard before spending $2,500 on a $7,000 travel trailer.
The table below gives a framework. These aren’t strict rules, but they reflect the tradeoffs that experienced owners and RV technicians run through when advising budget camper owners.
| Rig Value | Repair Quote | Repair Makes Sense? |
|---|---|---|
| $15,000+ | Under $3,000 | Almost always yes |
| $10,000-$15,000 | $1,000-$2,500 | Usually yes if interior is solid |
| $10,000-$15,000 | $3,000-$4,500 | Borderline; depends on condition |
| $6,000-$10,000 | $2,000-$3,500 | Borderline; get a full inspection first |
| $6,000-$10,000 | $3,500+ | Consider walking away |
| Under $6,000 | $1,500+ | Walk-away calculation is real |
The threshold most used in forums and by RV technicians: if the repair quote exceeds 25-30% of what you could sell the rig for in its current condition, you’re in walk-away territory. At that point, the repair money goes further as a down payment on a better rig.
One caveat: get a complete scope before deciding. A quote that includes decking inspection can change significantly once the membrane is lifted. Ask specifically whether the estimate accounts for any decking replacement, or whether that’s a potential add-on.
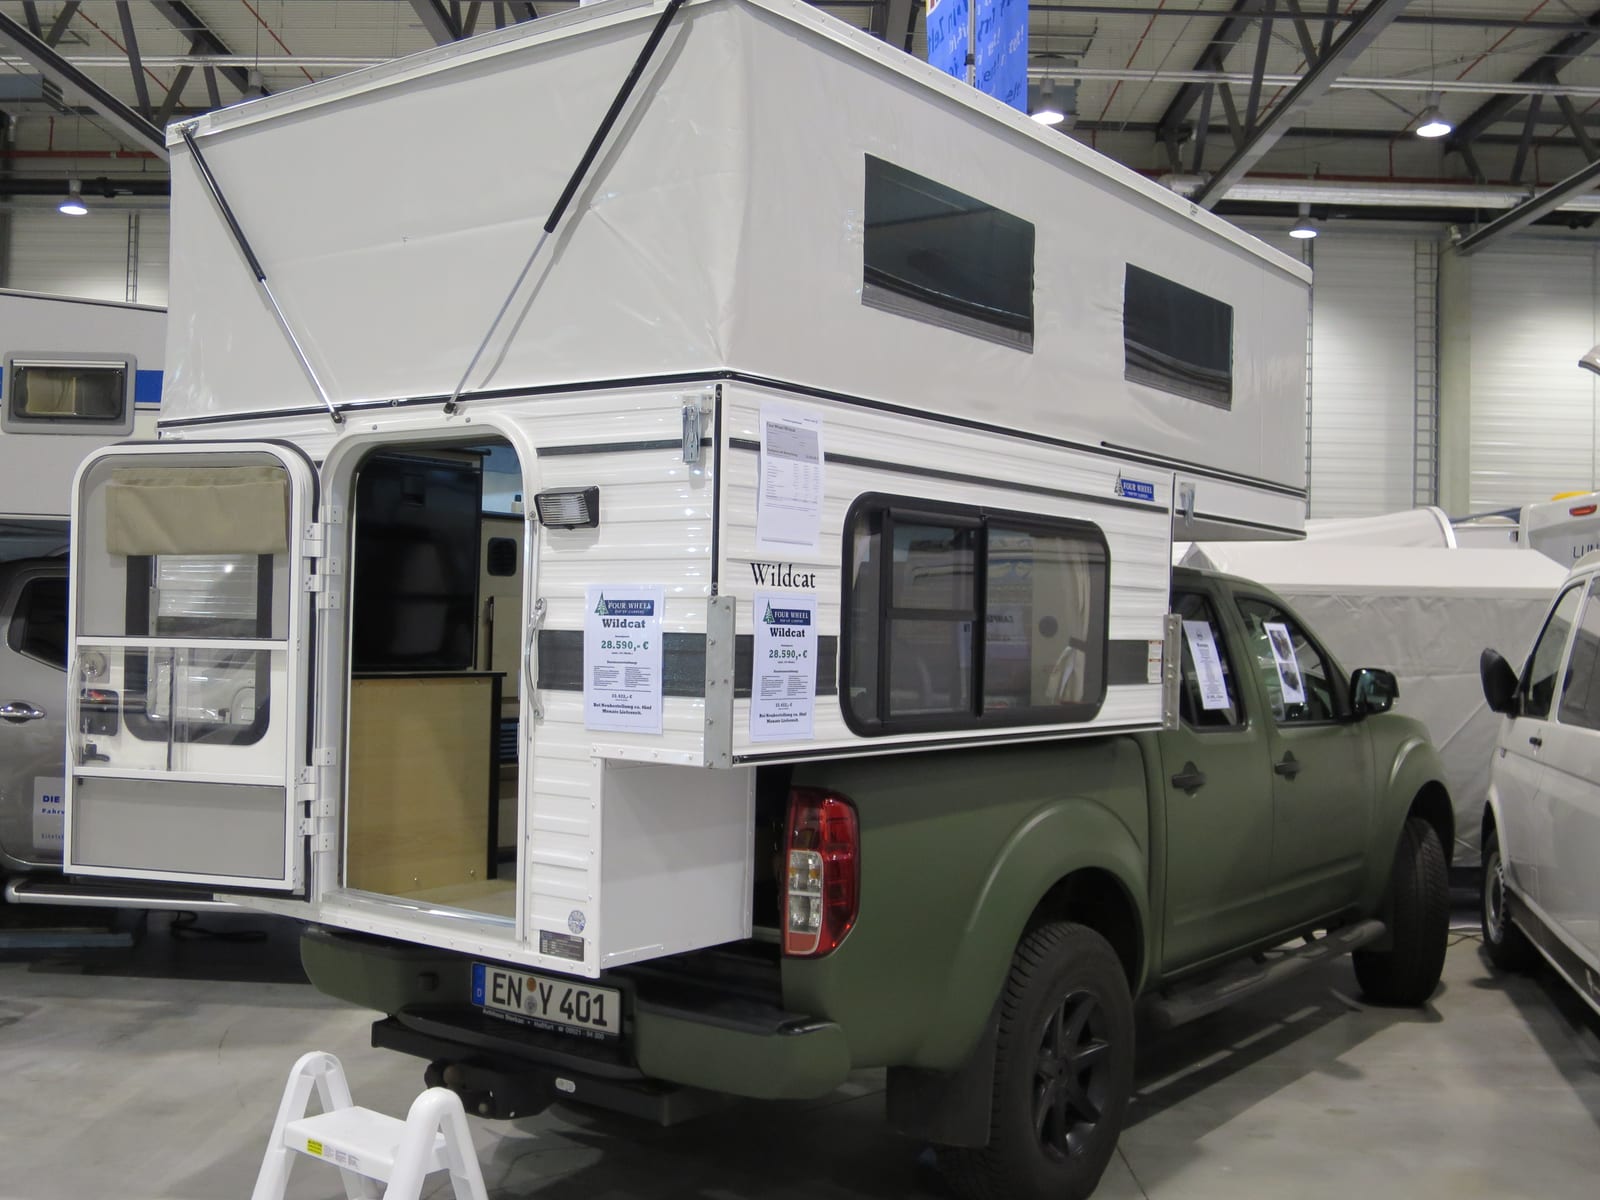
Truck camper roof specifics
Truck campers carry their own set of roof vulnerabilities. The cab-over section is the highest point and the first to take sun and impact damage. Water that enters the front cap seam migrates toward the truck bed mounting area and can soak the foam insulation in the walls before showing up anywhere visible inside.
Because truck campers are smaller than travel trailers, total square footage is lower and material costs come down. A hard-shell truck camper roof replacement runs $1,800-$3,500 for the cab-over section professionally done. But the cab-over geometry makes the repair harder to access, which can offset the square-footage savings in labor.
Annual inspection on a truck camper should include the front cap seam, both side roof seams running fore-to-aft, the seam where the cab-over section meets the main walls, and every vent, fan, and AC collar. Those intersections are where truck camper leaks start.
How far DIY gets you
For camper owners who bought a budget rig precisely because they’re comfortable doing their own work, EPDM repair is genuinely approachable. The two essential products:
Dicor self-leveling lap sealant flows into gaps, self-levels around curves and irregular surfaces, and cures flexible so it doesn’t crack with temperature changes. A tube costs about $12-$15 and handles several penetrations. One tube per vent, more for long seam runs. Apply it on a warm day above 50 degrees F so it flows properly.
EternaBond RoofSeal tape bonds permanently to EPDM, TPO, aluminum, and fiberglass without primers. A 4-inch by 50-foot roll covers substantial territory and addresses tears, cracks, or areas where the membrane has separated at a seam. Press it down firmly over a clean, dry surface, and it stays put.
Where DIY hits its limit: soft spots underfoot, visible bubbling across large sections, or any ceiling staining inside the rig. Those signals mean water is in the structure, and what you need is a moisture reading of the decking and an inspection, not more tape.
For a deeper look at what a professional reseal covers and when it’s worth paying for versus doing yourself, the roof resealing guide walks through the full process.
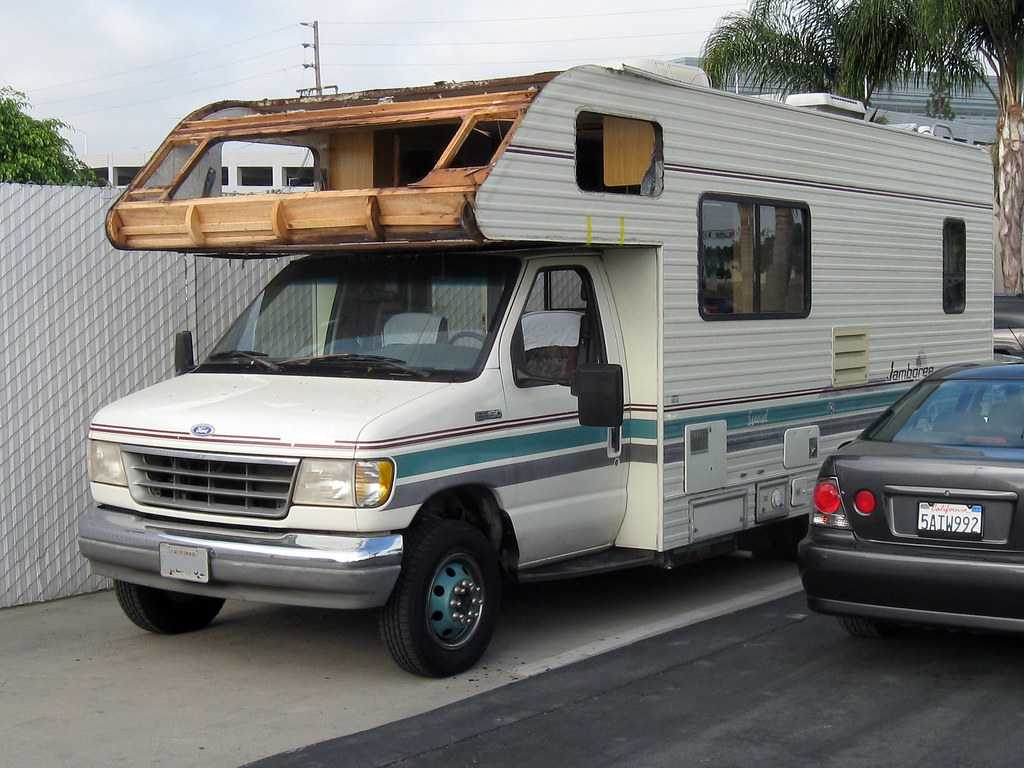
What the damage timeline looks like
A small seam failure at a vent collar on a 2010 travel trailer:
- Same season detected: Cost to repair is $300-$700. The membrane is intact; the entry point is sealed; the decking under that spot dried between rainstorms and didn’t rot.
- One winter later: The same entry point let water in through eight or ten rain events. The plywood decking in a 3x4-foot section is wet and beginning to soften. Repair cost is now $1,500-$2,500 once decking replacement is factored in.
- Two or more seasons later: Soft decking has spread, ceiling material is stained, and water may have tracked into the wall cavity. Repair cost is $3,000-$5,000+, and that number is no longer obviously below the rig’s value.
That trajectory is why every source on camper roof maintenance says the same thing: find it early, fix it early, and do a reseal every season regardless.
The RV water damage repair guide covers what happens after moisture reaches the interior, including flooring, walls, and structural framing costs.
What insurance covers (and what it doesn’t)
Sudden storm damage, a hail event, or a branch through the roof falls under comprehensive RV insurance. You pay the deductible, the insurer covers the rest, and the repair gets done at shop rates.
Gradual wear, UV degradation, and a slow seam failure that built up over two seasons is not a covered event under any standard RV policy. That’s maintenance, and it’s on you. The insurance and warranty guide covers how to document storm claims properly if you do have a covered event.
If you’re unsure whether your damage is storm-related or wear-related, photograph everything before touching it and contact your insurer before scheduling repair work. Repairs made before an adjuster sees the damage can affect the claim.
Keeping costs down
Three habits that keep camper roof repair costs manageable:
Get on the roof twice a year. Spring before the first trip, fall before storage. Walk every inch. Press every seam. Check every collar. It takes 30 minutes.
Reseal proactively. Sealant that has cracked or pulled away from a surface, but hasn’t started admitting water, costs $15 and 10 minutes to address. The same spot after one wet season costs hundreds.
Store out of the sun when you can. UV degrades EPDM and TPO faster than anything else. A covered storage spot adds years to a rubber roof. A white roof coating applied every two to four years also extends membrane life and reflects heat.
For campers where the value calculation is already close, this maintenance discipline is the difference between a rig that’s worth fixing in year eight and one that isn’t.
If you’re working through quotes and want to compare what full membrane replacement runs for a specific camper type, the general RV roof repair guide covers the full range including larger rigs and motorhomes. For pop-up campers specifically, the pop-up camper roof replacement guide addresses the canvas and liftable-roof issues unique to that style.
What drives the price
| Cost factor | How it moves the price |
|---|---|
| Camper size and roof square footage | A compact 18-foot truck camper might have 200 sq ft of roof; a 32-foot travel trailer has 450+. Material costs at $2.50-$5.50/sq ft and labor at $2-$6/sq ft scale directly with size. A small rig can cost half what a large one does for the same repair type. |
| Roof material | EPDM rubber is the most common and most affordable to repair: small patches run $300-$700. TPO repairs cost $400-$800 for comparable work because heat-welding or specialty adhesives add labor. Fiberglass and aluminum are less common on budget towables but escalate faster when damaged. |
| Damage severity and decking condition | Surface-level seam failures cost $300-$800 to fix. Once water soaks the plywood decking, add $1,500-$3,500 for substrate replacement. A $600 repair quote can turn into a $3,000 bill once the membrane is lifted and wet decking is exposed. |
| How long the leak went undetected | A seam failure caught in the same season it opened costs a few hundred dollars. The same failure left through one wet winter commonly pushes repairs past $2,000. On a budget rig, that gap can be the difference between fixing it and walking away. |
| Labor market and shop type | Mobile RV technicians typically charge $100-$175/hr plus a trip fee. Dealer service departments run $150-$225/hr. Rural areas cost considerably less than coastal metros. For the same two-hour patch job, expect $280-$500 in the Midwest versus $500-$800 in California or the Northeast. |
| Number of roof penetrations | Every vent, AC unit, and antenna mount needs individual resealing. Budget campers often have 4-6 penetrations. Each adds $50-$150 in labor at a shop; doing them yourself with Dicor sealant costs $12-$15 per tube. |
| Rig age and overall condition | On a 15-year-old camper worth $8,000-$12,000, a $3,500 roof job represents 30-40% of the rig's value. That math rarely makes sense. On a newer rig or one with low mileage and a solid interior, the same repair is straightforward to justify. |
DIY or hire a pro?
- Cost
- $150-$550 in materials
- Time
- A weekend
- Skill
- Beginner to intermediate
Camper owners with EPDM roofs have a genuine DIY advantage. Dicor self-leveling lap sealant handles vent collars, seam caps, and penetration flanges for about $12-$15 a tube. EternaBond RoofSeal tape bonds permanently to EPDM surfaces and covers cracks and membrane tears without primers or special tools. A full DIY reseal kit with coating, primer, tape, and sealant runs around $550, compared to $2,800-$4,800 for professional replacement. DIY works well when the membrane is intact and damage is surface-level. Stop and call a pro if the roof flexes or feels soft underfoot, if you find pooled water under the membrane, or if the ceiling shows active staining inside the rig.
What you'll need
- Dicor self-leveling lap sealant
- EternaBond RoofSeal tape
- Liquid Rubber EPDM roof coating
- EPDM seam primer (Heng's or similar)
As an Amazon Associate, we earn from qualifying purchases.
- Cost
- $300-$6,000 depending on damage scope
- Time
- 1-2 shop days for patch work; scheduling often 2-3 weeks out
- Booking
- Get at least two quotes
A pro is the right call when water has reached the decking, when the damaged area covers more than a few square feet, or when you cannot find the leak source. Leak tracing on a camper can take 1-2 hours at shop rates. Before authorizing repairs, ask the tech to inspect the decking condition once the membrane is lifted and get the total scope in writing.
Will insurance or a warranty cover it?
- RV insurance may cover this when the cause is a covered peril (storm, collision, fallen tree), not gradual wear or neglect.
- This is usually out of pocket. Standard policies treat it as wear and maintenance. A service contract bought before it fails is the main way to shift the risk.
Storm events (hail, wind damage, falling branches) are typically covered by comprehensive RV insurance after your deductible. Gradual wear, UV degradation, and maintenance-related deterioration are not covered by any standard policy.
Coverage depends on your policy and the cause of damage. Confirm specifics with your provider.